Sunday, January 31, 2016

The Pantry Puzzle. . .

We've all been there before--Just home from work, no intention of going anywhere else, favorite show on the tube, and what the heck do you make for dinner?  I don't know about you, but for me it usually involves a couple of trips back and forth between fridge, freezer, and pantry in an attempt to piece together a meal that somewhat makes sense.  Though it is a good cheat, I try not to play the "heap a bunch of stuff in a pan and throw in some cream of mushroom soup" card very often, because casseroles, though convenient, can get rather tiresome after a while.  One particular night, I had some chicken in the freezer, some pasta shells in the pantry, and a great idea before Doctor Who came on.

From the pages of Cooking for Adventurers:

FIRECRACKER CHICKEN

2 Boneless, skinless chicken breasts
1 Sixteen oz. can of tomato sauce
1 Ten oz. can of diced tomatoes and chilies, drained*
4 oz. chopped mushrooms
1 Medium onion, chopped
1 Cup small shells
1/3 cup white wine
2 Tbsp. olive oil

*It should be noted, that canned, diced tomatoes and chilies are also available in mild, should members of your group like things a bit more tame.

To taste:

  • Salt
  • Seasoned pepper
  • Rosemary
  • Oregano
  • Cilantro
In a 5 quart saute pan, heat 1 Tbsp of olive oil and cook onions for one minute, stirring constantly.  Add mushrooms, 1/3 cup white wine, and tomatoes & chilies.  Reduce heat and simmer until wine has almost evaporated.  Remove from pan and set aside.

Start pasta boiling.

In the saute pan, heat remaining olive oil over medium heat and saute chicken breasts, seasoning with Seasoned pepper and rosemary.  When chicken is cooked through, add tomato sauce, salt, oregano, cilantro, and reserved mushroom/onion/tomato mix.  Stir thoroughly and simmer, covered, over low heat for about six to seven minutes.  Serve with pasta.

And there you go.  A quick fix after a hard day at work.  This recipe obviously serves two, but can be increased rather easily if you have a larger group to fend for.  Tuck into a plateful with your favorite beverage and a friend or two, and stay warm this winter!

Wednesday, January 27, 2016

Surviving Interplanetary Maladies. . .

Good evening, everyone!

My conspicuous absence from all things interwebby has, unfortunately, been spurred by my latest brush with the Martian Death Flu, or something just as horrific with a clinically unpronounceable name.

  • Do I feel horrible?  Yes.
  • Have I been to see a doctor?  No, as I am pretty certain I have a good chance of surviving this on my own
  • Am I using Medical Science?  Yes.  OTC phlegm-fighting goodness
  • Why are we discussing this?  See below. . .
As we have discussed before, I am a firm believer in the fact that science is the only thing that will save us from ourselves.  I could go on a rant about homeopathic "cures", people who are "pro-disease" (read:  anti-vaxxers), and a host of other "thoughts and prayers" feel-good stories I've heard about this thing or that thing working, but I'm not.  I don't give credence to detoxifying and cleansing foods/smoothies/elixirs, because they tend to do nothing of the sort (unless you consider screaming diarrhea "cleansing")  I have a liver and kidneys for that, and they work just fine.  I just want to make it perfectly clear that my stance on medicine is, usually, bring on the science.

Now, that being said, there is still something to be gained in what I like to call "grandma's kitchen" remedies.  You all know the ones--your grandmother or some other learned relative or friend knew how to make this poultice or that salve which just worked wonders for whatever the heck was wrong with you at the time.  Before medical science had advanced to the point of realizing microscopic organisms were responsible for disease, people had developed an understanding of using foods and herbs to help ward off diseases.  Some foods, such as garlic, cabbage, and honey have antibiotic properties.  This doesn't mean you should rely solely on any of these when illnesses occur (let's face it, strep will kill you pretty efficiently), but they can sometimes help add some comfort when you're on the mend.

As an aficionado of hot foods, my grandmother would always have something in her kitchen that would open my head up even when I had the worst cold or attack of allergies.  As such, when I get into the situation I'm in now, I will tend towards excessively spicy foods for relief and a better breathing experience.  Most of the time, I will snatch a spoonful or three of a homemade barbecue/salsa sauce that probably has enough capsaisin to classify it as a lethal weapon in some parts of the world.  Other times, I will mix up a little concoction composed of water, cider vinegar, ginger (because I like the flavor), and copious amounts of cayenne pepper.  Wives' tales abound about cayenne's curative properties, but the one fact is that cayenne will get the juices flowing.  Ergo, when things get a little stopped up in the head region, I take a shot or two and get back to what I was doing.
6 oz. water, 2 Tbsp. ACV, 2 Tbsp. honey, 1 tsp. cayenne pepper, and a little ginger.

The main thing to remember, though, is that everything you eat or drink causes a change in your body.  Adding a food allergy to your symptoms would not be a fun ride, nor would eating the enamel off of your teeth because you didn't dilute your Apple Cider Vinegar well enough.  How medicines work can be affected by food, drink, or herbal supplements, also.  Before you try an herbal this or an old-fashioned that, you should discuss its effect with your doctor.  Most family practitioners have heard it all, and they are pretty good at determining whether or not Aunt Saidie's Chicken Soup cure will be comforting or detrimental to your treatment.

So, for those of you that have asked, this is the reason I haven't been around much the last couple of days.  The illness is on its way out, and we will get back to our regularly-scheduled programming very soon.  For now, I'm going to go grab some tea and watch some sci-fi reruns.  

Stay warm and cozy, adventurers!

Sunday, January 24, 2016

Using it All. . .

Let's face it, if you mention "giblets", most people within earshot are going to get a very uncomfortable look on their face.  Most everyone who hears the term first thinks "liver", and all the childhood trauma that went along with it.  I have to say, I was never one of those children.  Growing up, we had chicken livers quite often; they were a cheap source of dietary protein and, when flour coated and fried, were excellent for dipping in mashed potatoes.

Whatever caliber of adventurer you fancy yourself, you are going to run into giblets during your cooking life.  Butchered chickens usually have them in a baggie in the body cavity, the same as turkeys.  Hunters find them while cleaning game.  Pheasant, grouse, doves, and even squirrel and rabbit (though, technically, "giblets" is used exclusively for items from birds) are sources for visceral organ meat.  With four kids, we go through an inordinate amount of birds and game.  Sometimes we use the giblets and sometimes they just get frozen, waiting to be used en masse.  Commonly, people will use them for gravy, but they can make a very savory stew, with which your slow-cooker is only to happy to assist.

Now, I'm not going to sugar-coat this--if you don't like liver-ey things, then this stew is not for you.  No matter how you season it, it is still going to taste like organ meat.  Just the name made it hard for me to try as a child, and I liked liver.  This stew makes a hearty gravy, which makes it perfect to serve up over egg noodles, rice, or Texas toast.  My grandmother used noodles, so I've stuck with that over the years.

GIBLET STEW


2 lbs. giblets
3 cloves garlic, chopped
1 Green bell pepper, chopped
1 onion, chopped
6-8 oz. chopped, fresh mushrooms
One or two carrots, peeled and chopped
1 Tbsp. olive oil
½ Cup flour
1 cup beer or ½ cup red wine (can substitute one cup of broth)
2 tsp. Worcestershire sauce
1 ½ cups chicken broth
Salt, Pepper, Cayenne to taste.

8-12 oz. Egg noodles

Mix flour and seasonings to taste together in a bowl.  Place giblets in slow cooker and coat with flour mixture, stirring until evenly coated. 

Heat oil in a sauté pan and cook vegetables and mushrooms until onions become tender.  Add one cup of broth or beer (or ½ cup wine) and stir well.  Reduce heat and simmer until liquid is almost totally evaporated.  Add to slow cooker with 1 ½ cup broth.

Cook on high for 4-6 hours, or low for 8-10 hours.

Serve over a bed of egg noodles.

One of the things I like the most about this stew is that it is a taste of southern comfort.  A drawback to living in the northern tier of the country is that gravy doesn't usually exist in a palatable form.  You can find restaurants that serve liver and onions, but they serve it without gravy, which makes for a dreadfully dry experience.  If made properly, liver will make its own gravy, though you have to season it well.  A little time, some careful seasoning, and instantly you're transported back to Grandma's kitchen.

Wednesday, January 20, 2016

Mugging for the Camera. . .

Say it's eight o'clock.  You feel like a snack and a movie, but there's nothing in the house and the snow is piling up outside to the point that the Empire coming to storm your base would only be a marginally good excuse for going out.  The answer?  Bake a cake!

No, not a cake, cake.  A mug cake.

Mug cakes are simple and easy to make in a short time with few ingredients.  The first mug cakes I learned to make were protein cakes when I first started Personal Training.  Some of those were rather dreadful, as protein powders don't always taste like they are supposed to.  If you stick to traditional ingredients, though, you can actually come up with a very palatable dessert without making a mess or missing the opening credits.  Here are a couple I've made when supplies were limited and the disk was already spooling up in the DVR-->

PEANUT BUTTER CHOCOLATE CAKE

You will need:

One mug, slightly greased
 One Tbsp. each of flour, cocoa powder, and brown sugar


 One egg


 Two Tbsp. Peanut Butter


1/4 Tsp. Baking Powder


Chocolate chips, cut up chocolate bar, or nuts.  Here, I'm actually
using vanilla chips.
Mix everything together until you get a consistent batter, then place it in the microwave.  Cooking times will vary, because of microwave power levels, so this is something you'll have to play with.  For me, 50 seconds seems to suffice.

During cooking, the cake will extend over the top of the mug.  Don't panic!  It will actually settle after the mic stops.  The cake will be exceptionally hot at this point, so it will take a bit to cool.  You can speed the cooling process by dumping the cake out onto a plate, but you can also eat it straight from the mug.  This recipe isn't the sweetest (think European chocolate), thanks to the peanut butter and cocoa powder, but you can add some confectioner's sugar if you'd like it a bit sweeter.

Another you can try is only a three-ingredient cake:

In a slightly greased mug, mix:
1/4 cup powdered sugar
1 or 2 Tbsp cocoa powder
1 egg
Optional--Chocolate chips or candy bar fragments, etc

Beat everything until you have a smooth batter, then nuke it for approximately one minute. Don't forget to let it cool!  

And now, you're ready to tuck into some gooey cakey goodness and the movie of your choice!


Saturday, January 16, 2016

Making Like a Shepherd. . .

Winter comfort foods are the best, especially when there's 24 inches of snow on the ground and you can watch it pile up by the minute.  We spent several hours of the morning clearing snow and cutting paths to our outbuildings and workshops at the Makerspace, just to go back a few minutes later and leave deep footprints in the snow.  A warming meal was a welcome thought, indeed.

Most likely an invention of the Scottish and those north of Britain, the Shepherd's Pie (or Cottage Pie) came into being in the late 1700s, as the potato was an edible crop that was easily accessible by poorer families.  Originally used to take advantage of leftover roasted meats, the Shepherd's Pie takes many forms, using beef, mutton, venison, etc.  A number of years ago, I had a shepherd's pie made with ostrich (the really other red meat).  However you decide to put it together, though, it always turns out the same; a satisfying stew wrapped in mashed potatoes.  Whether you are suffering through the winter in a midtown apartment or a wood-heated cabin in the mountains, a good shepherd's pie is hard to beat, especially when shared with family, friends, and coffee.

The recipe I have here is easily manipulated.  It makes a largish pie, suitable for my large family.  It can easily be increased or decreased, depending on the size of your group.

SHEPHERD'S PIE

2 Lbs. potatoes, peeled and chopped
2 Tbsp. softened cream cheese
1 Egg yolk
½ Cup chicken broth
1 Tbsp. olive oil
2 Lbs. ground meat
1 Carrot, chopped (approximately 2 cups)
1 Onion, chopped
2 Tbsp. butter
2 Tbsp. flour
2 Cups chopped fresh (or one can) mushrooms
½ Cup Merlot
1 Cup Beef Broth
2 Tsp. Worcestershire Sauce
1 Can each, peas and corn
Salt, Pepper, Paprika, to taste


Boil the potatoes until they soften.  Drain and pour them into a mixing bowl.  Mix together the cream cheese, egg yolk, and chicken broth, then add to the potatoes and mash to your favorite consistency (additional butter and milk may be added if you like a creamier mash, but you need to keep it fairly thick).


Brown the meat thoroughly, then drain off any fat and pour into a baking dish.  Add olive oil to the pan and let it heat for a bit, then saute the chopped carrot and half of the onion for about five or six minutes, stirring constantly.  When done, add to the meat in the baking dish.  

Saute the mushrooms and remaining onion until the onions become tender.  Stir in the Merlot and reduce the heat, letting the wine simmer away to nearly nothing.  Add the broth and Worcestershire sauce, then stir in the flour, simmering gently until the mixture thickens.  Taste it at this point, to see if you need more seasoning.  I've found that the Worcestershire sauce tends to alleviate the need for added salt.


Stir the gravy into the meat and vegetable mixture in the baking dish, and then spoon the potatoes over the top, making a fairly thick "crust".  Sprinkle with paprika and place it under the broiler until the potatoes start to brown.  For my broiler, it takes about five minutes.  Yours might be different, depending on the distance from the heat source.  


Some variations of the Shepherd's Pie involve lining the baking dish with potatoes before adding the filling.  That might actually make things easier to handle when it comes time to dish it out, but I've found a good spoon works well enough to get a complete serving.  This was one of my rare "home run" dishes, as all of the kids really seemed to like it, though I do have to make a couple of servings without the gravy for my oldest son.  Either way, it's simple, easy, and a great way to become everyone's hero when your crew starts getting cold and hungry.

Oh, look. . .  It's snowing again. . .


Thursday, January 14, 2016

The End of an Era. . .

So, I broke my curry spoon the other day.  It sounds odd, I know, especially since I had it long before I learned to make curry.  In fact, I believe I originally got the spoon as a set when I was putting together my first set of camp cookware.  I had always loved camping, but I was just getting old enough to do it myself.  Though I had no idea what I was doing at the time, I decided to put together a backpack of "necessary items" to keep packed in case the urge to hit the woods ever, well, hit.  All in all, despite my then lack of experience with backpacking and survival camping, I think I did pretty well, as I had actually managed to live a week in the wilderness with everything in that small pack, but I learned very quickly that "smaller is better"--therefore, my big spoon was relegated to my small collection of home cookware.

In short, I've had this spoon longer than I've had my wife.  For a guy, I suppose that's saying something.

I bring this up because, despite the amount of material objects we tend to collect as we live our lives, the fact of the matter is, we usually only utilize a small portion of the pile.  I have a fully stocked arsenal of kitchen tools and gadgetry, but on a daily basis will mostly use only a handful of items.  I have a favorite bamboo turner, a go-to chef's knife, a whisk that I save for special occasions, and the aforementioned curry spoon, may it rest in peace.  This is the reason why I am going through the act of simplifying.  There are two adults, four kids, and a cat living in this house, and I still have a couple of totes in the basement packed with dinner/cookware that we haven't opened since we moved up to the Upper Peninsula.  Once I get everything I need in the Makerspace's kitchen, I'm going to have a whopper of a yard sale.

My curry spoon has been a go-to utensil throughout my years of learning to cook.  I gave it that title when, in the early 2000's, I mastered the fine art of simple, Indian curries.  Since then, its blue had been forever stained by the brutal onslaught of turmeric, but it never faltered in the face of adversity; not even when I made my first vindaloo.  It has been more than two decades since I have spoken to my friend, Madhi, to whom I owe a great deal of my addiction to Indian cuisine, but I would hope that she would be proud of my accomplishments.

In the noble spirit of adventuring, when you learn to do something properly, you also come up with ways to shortcut the heck out of it.  I could go to great lengths telling you how to do a proper curry (and will, no doubt, in the very near future), but for now, how about a little cheater recipe, in memory of my old friend, the curry spoon.

CURRY IN A HURRY

1 Tbsp. Olive Oil
1/2 Cup Chicken Broth
1/2 Cup Milk
3-5 Tsp. Red or Tandoori Curry (to taste)
2 Tbsp. Mango Chutney (hot or mild)
Chili Powder (to taste)
2 Boneless Chicken Breasts, cubed
1 Medium Onion, Chopped
1 Cup Instant Rice

Heat the oil in a saute pan until it starts to shimmer, then cook the onion, stirring constantly, until it just becomes tender.  Set the onion aside in a bowl and cook the chicken in the remaining olive oil, sprinkling with chili powder (note that I turn the chicken red with chili powder, but I'll leave the amount up to your taste).  Once the chicken is cooked thoroughly, remove it to the same bowl as the onion.  

Mix together the broth, milk, curry, and chutney, then add it to the pan.  Bring it to a simmer over medium heat, stirring occasionally.  Once the sauce reaches a gentle simmer, add the chicken and onion, cooking for about a minute more.

Serve over a bed of rice.

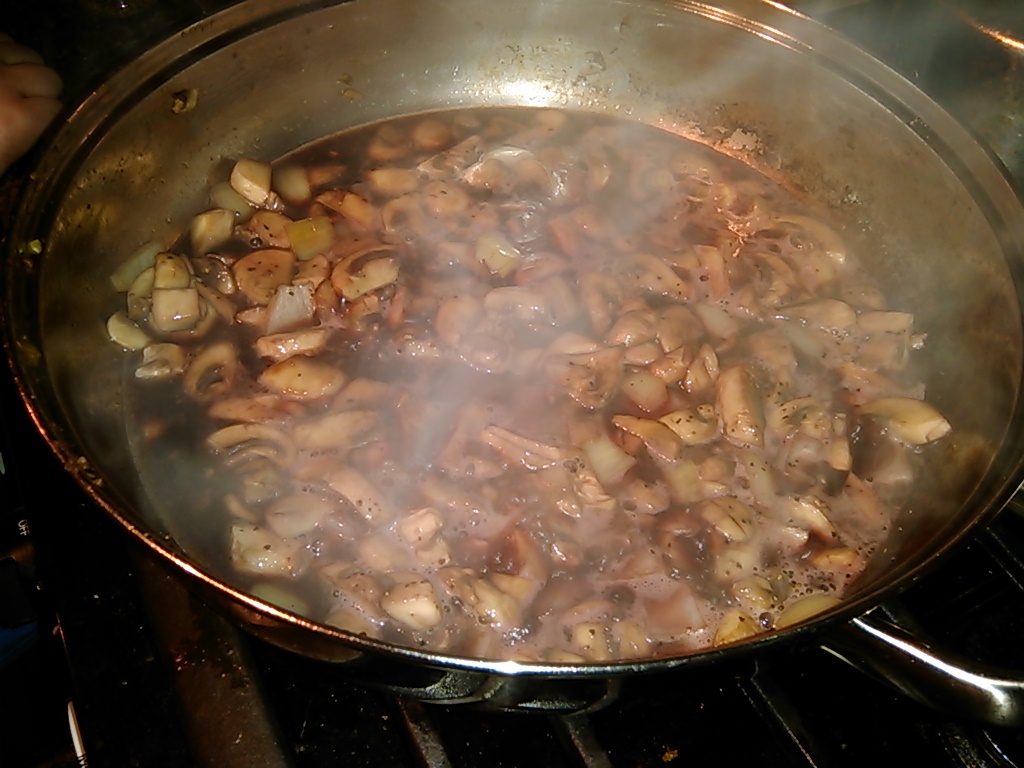
The color of the final product will depend on the type of curry powder you use and the fervor with which you apply chili powder to the chicken as it cooks.  Yours might not be as juicy as the pic above, either--I just really love my curry sauce.  For a bit more color and flavor, you can stir fry vegetables with the onions, or ad steamed veg during the final simmer.  Broccoli goes very well with this sauce.  My first curry was a horrible wreck; a product of my own inexperience, and some exceptionally old curry powder.  I have since learned several lessons, including making sure the curry powder isn't older than the person using it.

So there you have it, friends.  A warming dish, simply done, and perfect for any time of year, regardless of the spoon you happen to use.

Tuesday, January 12, 2016

So, You Have a Kitchen. . .

I suppose, the proper question to ask would be, "what do you do with it?"  There are many, like myself, who view the kitchen as a place of experimentation and learning, where art is made and your disasters get fed to the compost bin.  A few others look at the kitchen as the place to keep the microwave and coffee maker.  Still others don't even bother with the place at all, only using it as a way to get from the living room to the attached garage.

Aside from not being the healthiest choice (assuming your meals are coming from a multitude of restaurants), the latter is exceptionally wasteful.  Why let an entire room of the house, let alone one that can be so useful, lay fallow while you clog yourself up with who knows what?  We moved into a rather nice 3 bedroom home in downstate Michigan in August of 2000 that was equipped with little more than a galley-style kitchen.  The previous owners, neat-freaks to the Nth degree, never used the kitchen at all (actually, they used it once, but that discovery is a story for another day).

Like everything else we do in life, the preparation of food is as simple or complex as we want to make it.  You can heap your kitchen full of all sorts of ridiculous gadgetry, or just make due with a few pans and a knife set.  I prefer to be simplistic, though I have, over the years, learned the value of a garlic press and a few other little contraptions that help speed things along a bit better.  Microwaves are handy to have around, for quick defrosting and some prep tasks, but I shy away from them when it comes to outright cooking, since it is so easy to render food down to the consistency of shoe leather.  It should be noted here that I have, on occasion, used a Microwave to poach eggs.  They rarely turn out perfect, but it is a good way to scare the tar out of the family pets. 

If your kitchen is out in the wild (whether 'wild' for you means the woods or your back yard), you really only need two things:  fire and a utensil for moving the food around (yes, you do need food as well.  I can't spoon-feed everything to you, can I?).  Grills, whether gas or charcoal, are one of the most under-utilized items the American backyard enthusiast owns.  Most of the time, they are used for just brats, dogs, and burgers.  The adventurous soul will sometimes attempt chicken with marginal success, but when it comes down to it, the thing that scares people the most seems to be the fact that food can cook so much faster over fire.  It is very easy to take the life right out of poultry and scorch hamburgers to the point that it looks like you poured the charcoal on the cooking grill.  In Cooking for Adventurers, I outlined a tried and true method for determining the temperature of your fire called the "hand thermometer".  The idea is to hold your hand in the general area the food will occupy and count the seconds it takes before you have to move your hand.  Generally, anything less than 4 seconds is too hot to efficiently cook any protien, unless you are going for a seared outside and a wiggly center.

When it comes down to it, fire pits are greatly under-utilized, as well.  Why build a perfectly good fire just to let the kids wave marshallows on sticks over it, while you're cooking on a cramped propane stove?  One of my signature dishes on the fire pit is grilled salmon.  It can be done, you just have to watch what you're doing.

Like I mentioned yesterday, simplicity is going to be the mantra here.  Yes, we will explore some more-involved methods from time to time, but learning how to do more with less will be our goal. 

For tonight, take care.  Come our next post, we're gonna get cooking!

Sunday, January 10, 2016

The Road Not Taken. . .

Good evening, everyone!

The road not taken is the beginning of every adventure--it is a place you've never visited or something you've never done.  In short, it is something new.  Last November, I published the book, "Cooking for Adventurers".  Over the course of writing it, I experimented with several new methods and recipes, as well as recipes I had used for many years, tweaking and adjusting, until everything came out just right.  There wasn't a time during the book's creation that I didn't have a pile of papers waiting to topple over on the kitchen table.  I couldn't believe the book was finished; I thought it would never happen.

Now I'm writing another.

No, I'm not a glutton for punishment, I just love the process and the research.  Those who know me know of my work towards the building of Copper Island Makerspace, a grass roots makerspace with the idea of teaching people how to live sustainably and how to do more for themselves.  Along those lines, I have thought about adding some "how to" videos to my YouTube channel that involve some cooking related lessons, but then I thought, "What about my blog?"  So, here we are.

 Aside from being a well-received book, "Cooking for Adventurers" is also going to become a "food blog", if you will.  I will be featuring recipes, methods, and any other interesting little things that cross my mind that have to do with cooking, eating, or just making life a bit easier around the kitchen, whether that kitchen is in the home, or around a fire in the wilderness.  We will be touching on buying food, finding food, and making food somewhat edible.

Now, before we get started, one thing has to be made clear:  I am a science wonk.  I approach cooking as both a science and an art form, but I also am quite objective in my selection of materials with which to work.  I use fresh when I can, and grow my own when I can, but I sometimes use cans.  It happens.  This isn't a "fine dining" blog; this is a blog for the average, everyday person who finds it necessary to feed him/herself and maybe a small collection of extra humans, besides.  Sometimes, canned goods are necessary.  Hell, we may even talk about canned meats at one point or another, but there will be vegetables, too.  Come the spring, we will even talk about planting gardens that will help feed the family, as well.  All in all, it will be quite a ride.

All of this aside, I also welcome discussion.  I will respond to comments as quickly and as completely as possible.  Civil discussion will always be encouraged, and I will probably try to arrange some live Q & A as well.  Our first post will be tomorrow night--I hope to see you all there!

--Bob